Showing posts with label How to. Show all posts

Tiger Nails - Tutorial!

Well, my exams are finally over! Wooooohooooo!!!! Back to regular posts! I promised I'd be back on form with the nail art, with a bang, so today I've got a tutorial for you, for FIERCE tiger nails!


This looks complicated, but its really very easy when you break it down into steps! For the base of the tiger print design, I used the sponging technique to make a colour gradient. The only piece of equipment you will need for this, is a piece of sponge, I use the corner of a kitchen scrubber:


Select 3 polishes in "tiger" colours -  I am using Nails Inc Candy Orange , Essence Show Your Feet in Juicy Orange, and Miss Sporty Taxi:


I started with the middle shade, Candy Orange, and sponged on the darker shade, Juicy Orange, onto differing areas of the nail. It works best if you dab a small amount of polish onto the sponge, and lightly build up the sponged area, adding a little bit at a time. I then did the same with the yellow, Taxi, and these are the results:


After cleaning up the cuticles with a cotton bud and nail polish remover:

Next comes the stripes, I did two sets of stripes in black and gold, but you could just do the black if you wanted. I used Claire's Nail Art Pens in Black and Gold (the striping brushes inside), but you could easily use a striping brush or regular brush and polish if you don't have pens:


get a small bead of polish on the end of the brush, and starting at the nail edge, draw horizontal stripes that don't touch, but interlock to make the tiger print, zig zag pattern. It works best if you almost flick the striper towards the centre of the nail, as it makes a neat, tapered point. Start with the Gold stripes.

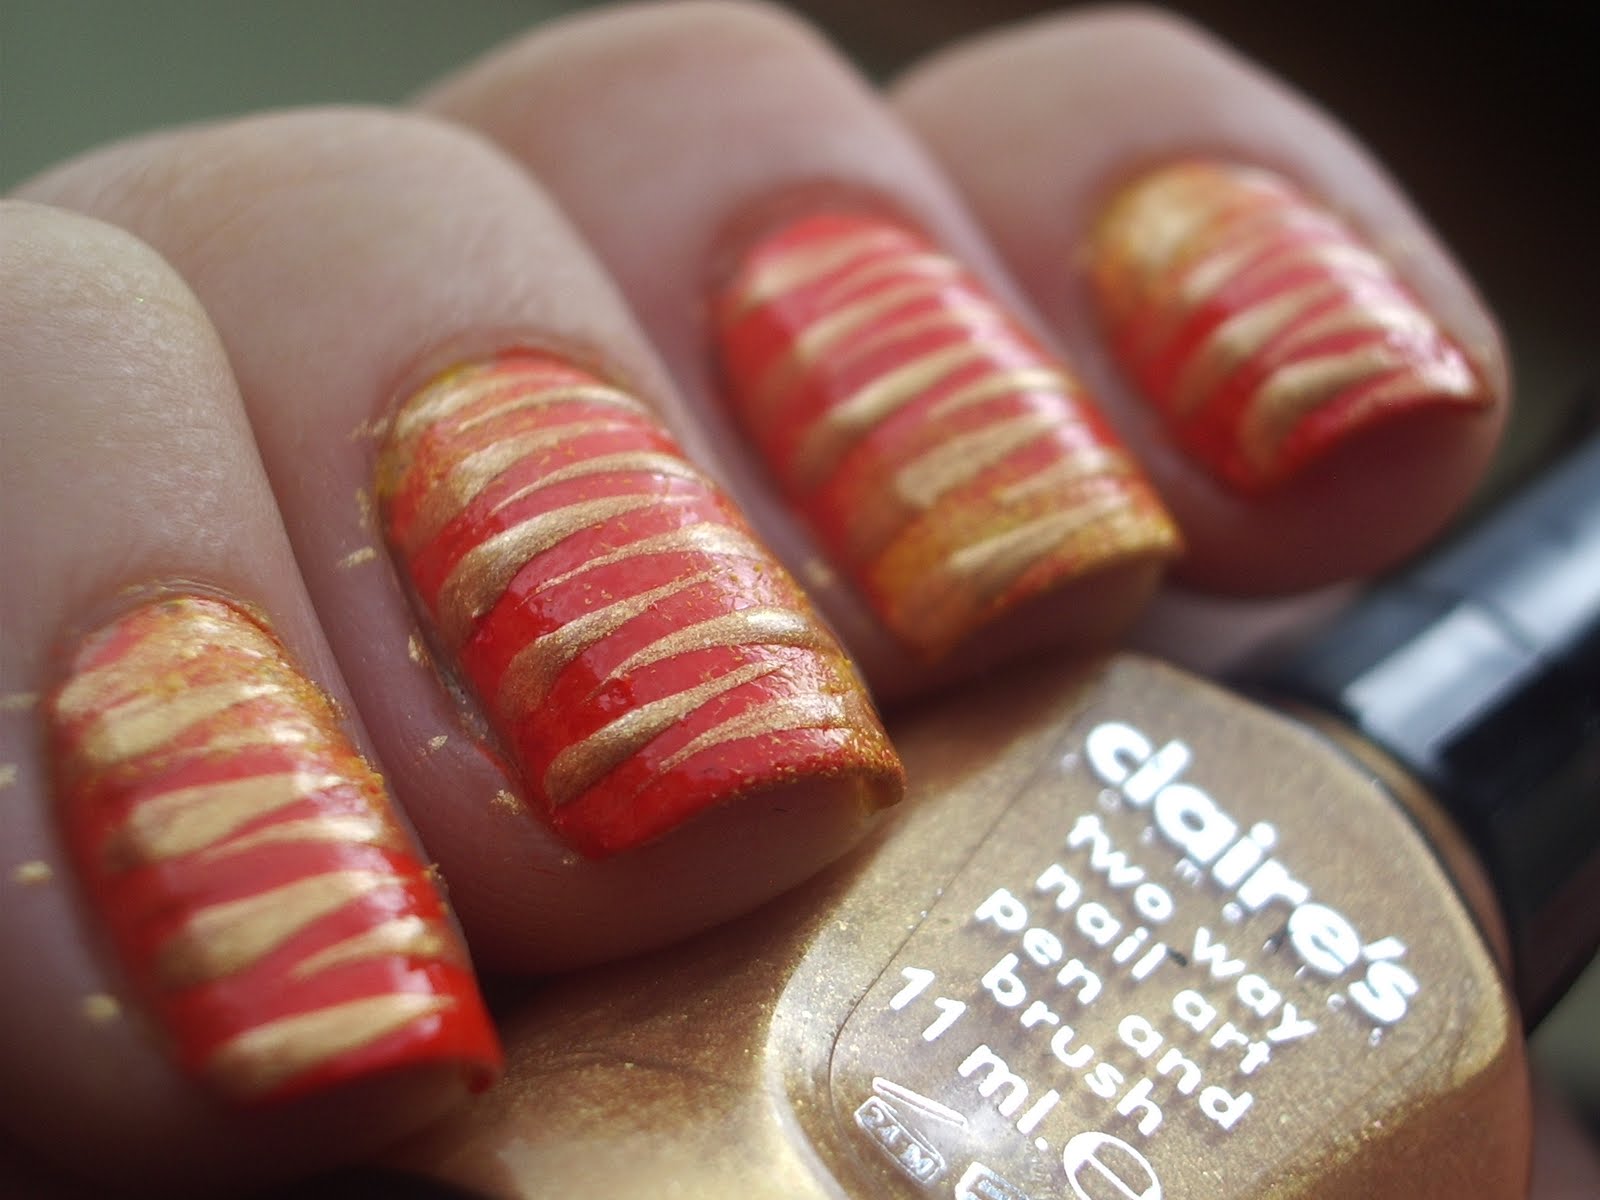

Once it's dry, you can go back with the Black striper, almost exactly on top of your gold stripes:


Add a coat of Seche Vite or your favourite topcoat, and you're done! I added the tiger face as an accent on the ring finger. Take an eyeshadow applicator (as the sponge is smaller and denser!) and add a small amount of white polish. Dab on the orange base like so:


Next, take a green, pink, grey and brown polish . with a dotting tool or brush, add two green dots to the bottom of your white sponged eye areas, and with the pink polish, draw a 'T' shape towards the nail edge. Contour the tiger's nose with two fine lines in brown polish. I added some grey whiskers with a fine brush.


All that's left to add is the black details, for which I used Claire's Black Nail Art Pen. Add your topcoat. You're all finished! Longest. Tutorial. Ever! Rest your tired eyes.


I hope you like them! Let me know what you think! Will you be trying it?

xxx

*EDIT* Because this post took BLOOMIN' AGES, I completely forgot to mention the reason I did this manicure in the first place! I knew Swaffie Blog was having an "inspired" competition, and I really wanted to enter. I was watching a documentary on endangered species, and decided to let the segment on Bengal Tigers be my inspiration! Here is the link to the competition, you can vote for me if you want my love and affection forever and ever and ever, I would really appreciate it :D:D. I am entry number 3! There are some fantastic entries, and you can vote for your favourite three, which I think is a great way of doing it, giving everyone a fair chance! :D


BundleMonster Contest Entry

If you haven't heard, BundleMonster (the creator and distributor of the Image Plates I use to create some of my designs) are having a Nail Art competition over at their Facebook Page. There are 25 sets of their NEW image plates up for grabs for those with the most "likes"! Voting opens on the 13th, and I would REALLY appeciate it if you could wander over, take a look at my entry (and the others of course) and see if I deserve a thumbs up! I implore you to enter yourself, too, what have you got to lose eh?

Here is my entry, you had to use Bundle Monster products and I wanted to submit something that showcased some skill, as opposed to just a simple painted base and stamped image, so I whipped the pan scrubbers out and did a pink to purple, sponged gradient base. I hope to do a sponging tutorial in the near future, as it definitely requires a "knack" and I think some people might benefit! I then stamped the flower image from BM16 in pastel blue.

I started with two coats of Barry M Strawberry Ice Cream, then painted a blob of MUA's Medium Pink Shade onto a small piece of sponge that I cut from a standard, kitchen pan scrubber. I then repeated this on the tips with Barry M Ltd ed. for Boots.


Now, I needed the stamped image to be very opaque, and I don't own Konad Special Stamping Polish in Pastel Blue, but I DO own the White - I'm going to quickly show you how I mixed my own Blue stamping polish:

I started with The Konad Special Polish and Barry M Cobalt Blue. I then popped a blob of each onto the image on BM16, next to each other (as opposed to on top of each other) so as not to gammy up the brushes:
I then used a paintbrush to swirl them together, you can create a cool gradient image if you only mix them up a  little bit.
Make sure you still do this mixing quickly, as if the polish begins to dry on the plate, it will be difficult to scape and stamp a complete image. Once you've scraped off the excess polish, and rolled your silicone stamp over it, you're ready to stamp the image in Pastel Blue:
BOOM! The stamping polish world is now your oyster -you can literally do this with any coloured polish to mix your own pastel Special Polish - this will save you splurging on all the different coloured Pastels that Konad offer, because you can still get a good quality, opaque image when using this technique. Cool!


I added clear Rhinestones to the accent nails with Nail Glue, silver dots to the centre of the flowers with Claire's Silver Nail Art Pen and then added 2 coats of Seche Vite - what do you think, was this good enough to be entered into the Bundle Monster comp? Some of the designs over there are really good, but my nails just aren't long enough to do something fancy-pants with lots of different stamps. I really like how a gradient Mani looks - I get asked if they're Minx all the time!

Don't forget I have Giveaway going on! Win yourself some sexy stuff!

PEACE OUT


Do Not Refreeze Guest Post

Hello Everyone! Happy Mother's Day!
Today's post is being hosted over at Leanne's wonderful blog DoNotRefreeze, where I will be doing a "lightning bolt nails" tutorial! Its was really kind of her to ask me to do it, and a great idea to get everyone involved.

Head over to HERE for these Bad-ass nails!


xxx

FOTD Green Eyed Monster

...Well, not "monster" hopefully. I used to rock this look a lot in my final years of school, I was a lot bolder with my style back then - I had pink hair for a start! I met my good childhood friend Emma for a free lunch today. I am a 'mystery diner' which means we get £40 to spend on food if we do a review afterwards! SWEET DEAL! We stuffed our faces, naturally. I was wearing a forest green dress from forever 21, and I decided to co-ordinate my make-up -


I absolutely HATE taking pictures of myself haha! here we have:-
  • FACE - Benefit Erase Paste in Medium, Rimmel Stay Matte foundation in 100 Ivory, MeMeMe Blusher in Rouge (these are meant to be a dupe for the benefit blushers, and although very pigmented, this is muuuuch redder than Coralista despite looking almost identical in the box. I'll have to do a comparison one day)
  • EYES - I used a very, very old 17 green eye palette. Dark forest green, light green and a yellowy gold - none of them have names. I don't think they do the exact combination anymore, but their green Eye Shadow Trio will do a treat, with a yellow gold shadow, in creating this look. Eyeliner is H&M Brown, Mascara is Max Factor False Lash Effect.
  • LIPS - Topshop Lip Polish in Iced Coffee. 
Here's a couple of shots so you can see the blending on the eyes -


This look is dead easy and you can use the same technique with literally any 3 shades of you choice. I started with the medium green on the eyelid, then used the gold in the corner, blending it outwards and slightly under the eye. I then took my darker shade of green, with a smaller shadow brush, and blended this from the outside edge inwards, creating a slight taper as I went, taking it under the eye and across to about halfway. Added some eyeliner to the water line and just along the top lash line, some mascara, and voila!

This is what my hair looks like from the back today, a messy rosette with the hair from the crown:


Close you eyes to the mountain of crap on my bed...cheers!

Another easy one - take two medium sized pieces of hair from each side of the crown, bring to the back of the head and pin in a cross shape, with 2 bobby pins, so one overlaps the other (this will hold it in place better). Take the little pony bit and wrap it around your finger so it makes a twist. Form the twist into a circle and pin in place at the end and the top, weaving the bobby pin inside the rosette so it cannot be seen. Spritz with hairspray. Five minute up-do!

I hope you enjoyed that my dears, any questions just let me know on the comments, or drop me an email :) A bit of exciting news, I will be doing a guest post for Leanne over at DoNotRefreeze in the next couple of weeks - it's a nail art tutorial, and a good one at that! :D

I'm trying to do tomorrow's Mani tonight and I'm SO uninspired. Need to have a think and a peruse of the BundleMonsters  I reckon. Only thing I know, it will be blue haha.

Take care everyone! xxxxxxx

Blog Archive