Showing posts with label Gold. Show all posts

Tiger Nails - Tutorial!

Well, my exams are finally over! Wooooohooooo!!!! Back to regular posts! I promised I'd be back on form with the nail art, with a bang, so today I've got a tutorial for you, for FIERCE tiger nails!


This looks complicated, but its really very easy when you break it down into steps! For the base of the tiger print design, I used the sponging technique to make a colour gradient. The only piece of equipment you will need for this, is a piece of sponge, I use the corner of a kitchen scrubber:


Select 3 polishes in "tiger" colours -  I am using Nails Inc Candy Orange , Essence Show Your Feet in Juicy Orange, and Miss Sporty Taxi:


I started with the middle shade, Candy Orange, and sponged on the darker shade, Juicy Orange, onto differing areas of the nail. It works best if you dab a small amount of polish onto the sponge, and lightly build up the sponged area, adding a little bit at a time. I then did the same with the yellow, Taxi, and these are the results:


After cleaning up the cuticles with a cotton bud and nail polish remover:

Next comes the stripes, I did two sets of stripes in black and gold, but you could just do the black if you wanted. I used Claire's Nail Art Pens in Black and Gold (the striping brushes inside), but you could easily use a striping brush or regular brush and polish if you don't have pens:


get a small bead of polish on the end of the brush, and starting at the nail edge, draw horizontal stripes that don't touch, but interlock to make the tiger print, zig zag pattern. It works best if you almost flick the striper towards the centre of the nail, as it makes a neat, tapered point. Start with the Gold stripes.

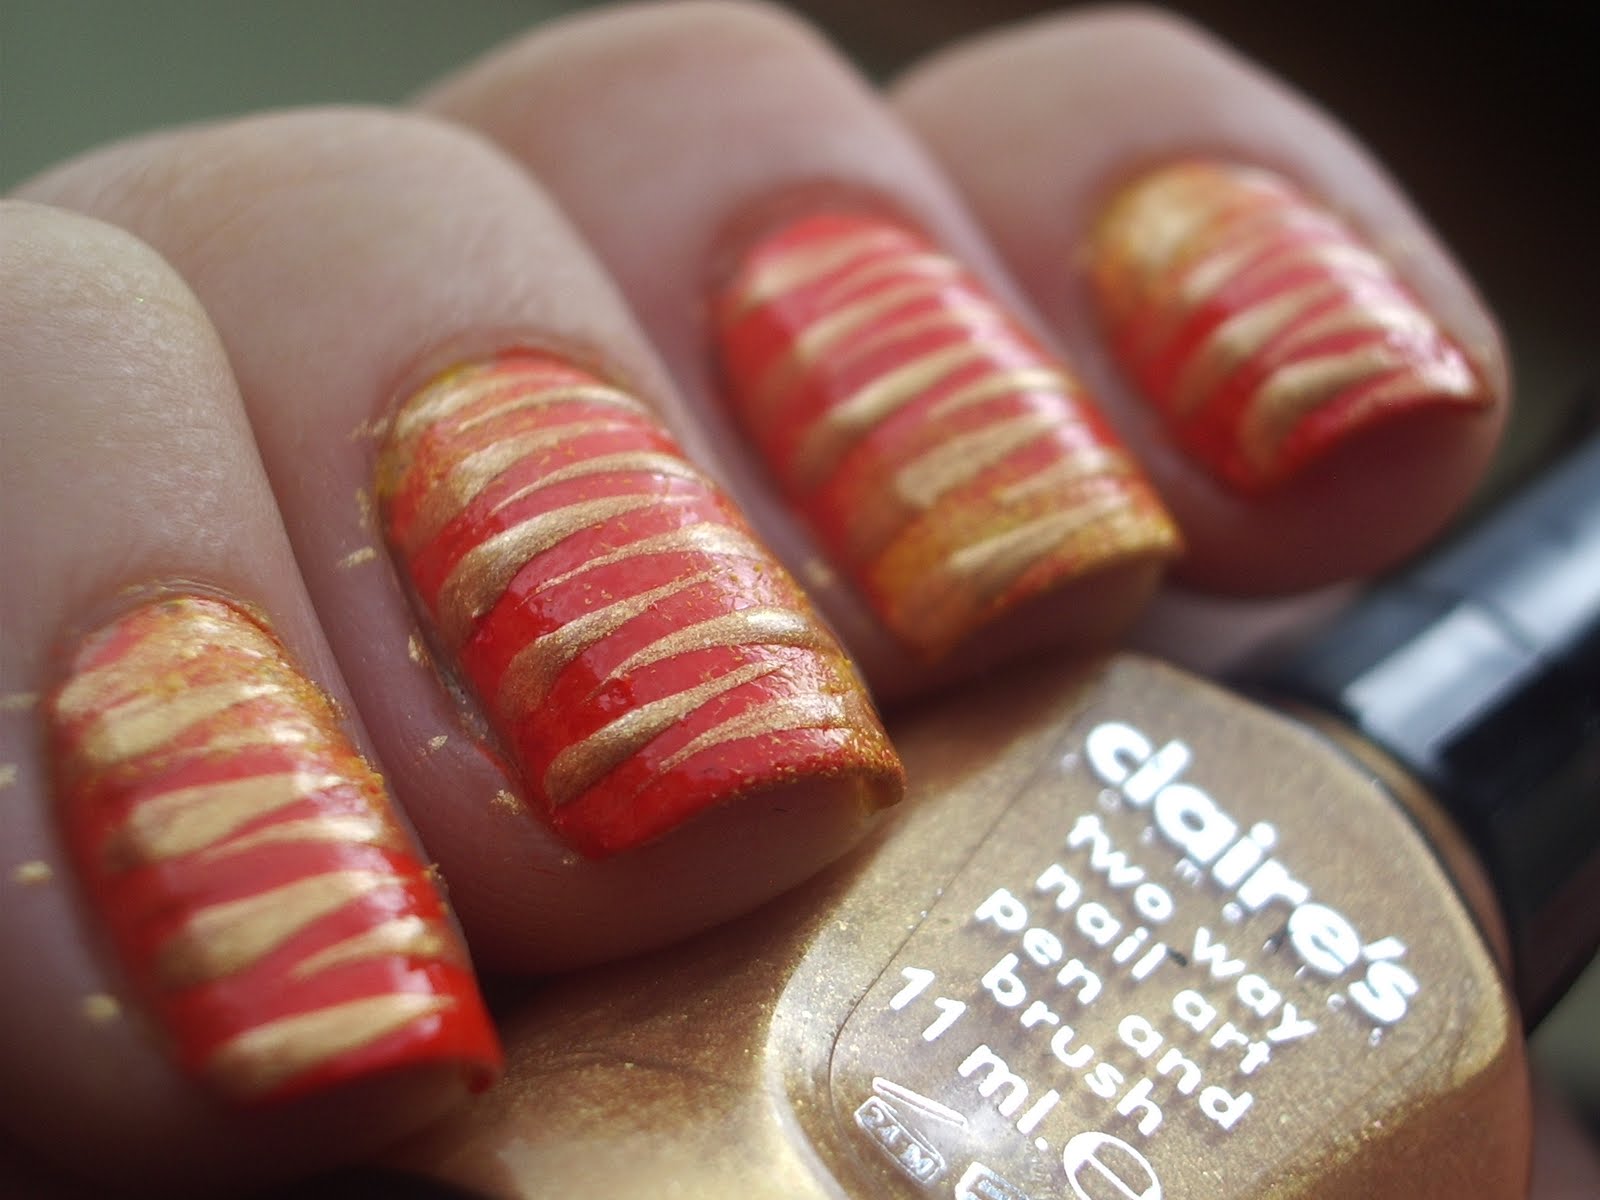

Once it's dry, you can go back with the Black striper, almost exactly on top of your gold stripes:


Add a coat of Seche Vite or your favourite topcoat, and you're done! I added the tiger face as an accent on the ring finger. Take an eyeshadow applicator (as the sponge is smaller and denser!) and add a small amount of white polish. Dab on the orange base like so:


Next, take a green, pink, grey and brown polish . with a dotting tool or brush, add two green dots to the bottom of your white sponged eye areas, and with the pink polish, draw a 'T' shape towards the nail edge. Contour the tiger's nose with two fine lines in brown polish. I added some grey whiskers with a fine brush.


All that's left to add is the black details, for which I used Claire's Black Nail Art Pen. Add your topcoat. You're all finished! Longest. Tutorial. Ever! Rest your tired eyes.


I hope you like them! Let me know what you think! Will you be trying it?

xxx

*EDIT* Because this post took BLOOMIN' AGES, I completely forgot to mention the reason I did this manicure in the first place! I knew Swaffie Blog was having an "inspired" competition, and I really wanted to enter. I was watching a documentary on endangered species, and decided to let the segment on Bengal Tigers be my inspiration! Here is the link to the competition, you can vote for me if you want my love and affection forever and ever and ever, I would really appreciate it :D:D. I am entry number 3! There are some fantastic entries, and you can vote for your favourite three, which I think is a great way of doing it, giving everyone a fair chance! :D


Boots 17 Crackle Polish

Boots' exclusive cosmetic brand "17" have well and truly jumped on the crackle-wagon, launching their own goldy-silvery Crackle Polish. Oooooooh the elusive and rarely seen left hand: -
The larger looking patch of purple on my pinky isn't a crack...its a smudge...lolz

Looking at these photos, it's growing on me....

                              
I'm not quite sure what I make of it so far. I like that it's freely available, cheap and a different colour to the other crackle polishes out there, but I prefer to see more of the base colour showing through. I also wish it was more gold.
Underneath the Crackle is Barry M Boots Ltd Edition, and its such a gorgeous mid-purple that it upsets me that it cant be seen through that much! It doesn't seem it from the photos, but my nails literally just look like a Champagne colour from a distance. The application was a dream though, this is a thin coat (thick coat on the thumb - they kind of crackled the same though, regardless) and it's a really smooth polish with a lovely shimmer. It doesn't dry as matte as the Barry Ms, nor is it as gloopy and fast-drying. You can see Barry M Instant Nail Effects HERE for comparison. Barry M cracks more - same purpose, totally different effects! Jury is still out on which one I prefer, they are both very different.

I have a different topcoat on the other hand, which I can't wait to show you tomorrow - I love it! :D

Have you tried this new crackle? What do you think? 

My brother, who has recently discovered my blog, is hankering for a shout out, and threw a huge strop yesterday when I forgot to mention him! This makes him sound 10 years old. He is 18, but still has the mind of a child. :P

HELLO EDWARD!

And in keeping with the theme of this blog, here is a picture of the face-paint I did for him last Halloween. Face-painting is another would-be hobby of mine, had I more opportunity to practice it!

Scary Clown, why so serious?!

Blog Archive