Showing posts with label Yellow. Show all posts

Bananarama

Facts about Bananas:
  • In 2001, Britain recorded 300 incidents of injuries related to bananas. The majority of these involved people slipping on banana peels.
  • In Eastern Africa you can buy banana beer. This beer is brewed from bananas.
  • A cluster of bananas is called a hand and consists of 10 to 20 bananas, which are known as fingers.  
These are MY banana fingers, a take on the, ever popular, Wah Nails Prada Banana Manicure:

I'm holding a banana, because there are bananas on my fingers - clever, I'm sure you will agree.


 Yep, my nails have had the chop. I had A LOT of unfortunate breakages, all at the same time, so didn't really have a choice! Thought about getting some Calgels on, but I have absolutely NO dollar at the moment! Full-Nail designs look great on both long ad short, so I'll be sporting them for a while! This is part of the reason for my unplanned absence, as well as trips to London, graduations, moving home and unpacking! 

I started with a base of Barry M Turquoise, my favourite blue evveeerrrrr - it's lovely and bright! I then made yellow crescent moon/banana shapes, using a fine brush, with Miss Sporty Taxi, and added a light yellow highlight using Rimmel's Lemon Drop. After outlining the whole thing using the striper in Claire's Black Nail Art Pen, I topped it off with a coat of Seche Vite

I realise it's not my best freehand work, pretty much if you can tell it's a banana, I'm happy! It didn't take very long at all, and is a really fun, summery look! I'm going to wear something different for my birthday, though, which is tomorrow! WOOPAH!

Hope you like it! Let me know which summer looks you've been wearing!

Tiger Nails - Tutorial!

Well, my exams are finally over! Wooooohooooo!!!! Back to regular posts! I promised I'd be back on form with the nail art, with a bang, so today I've got a tutorial for you, for FIERCE tiger nails!


This looks complicated, but its really very easy when you break it down into steps! For the base of the tiger print design, I used the sponging technique to make a colour gradient. The only piece of equipment you will need for this, is a piece of sponge, I use the corner of a kitchen scrubber:


Select 3 polishes in "tiger" colours -  I am using Nails Inc Candy Orange , Essence Show Your Feet in Juicy Orange, and Miss Sporty Taxi:


I started with the middle shade, Candy Orange, and sponged on the darker shade, Juicy Orange, onto differing areas of the nail. It works best if you dab a small amount of polish onto the sponge, and lightly build up the sponged area, adding a little bit at a time. I then did the same with the yellow, Taxi, and these are the results:


After cleaning up the cuticles with a cotton bud and nail polish remover:

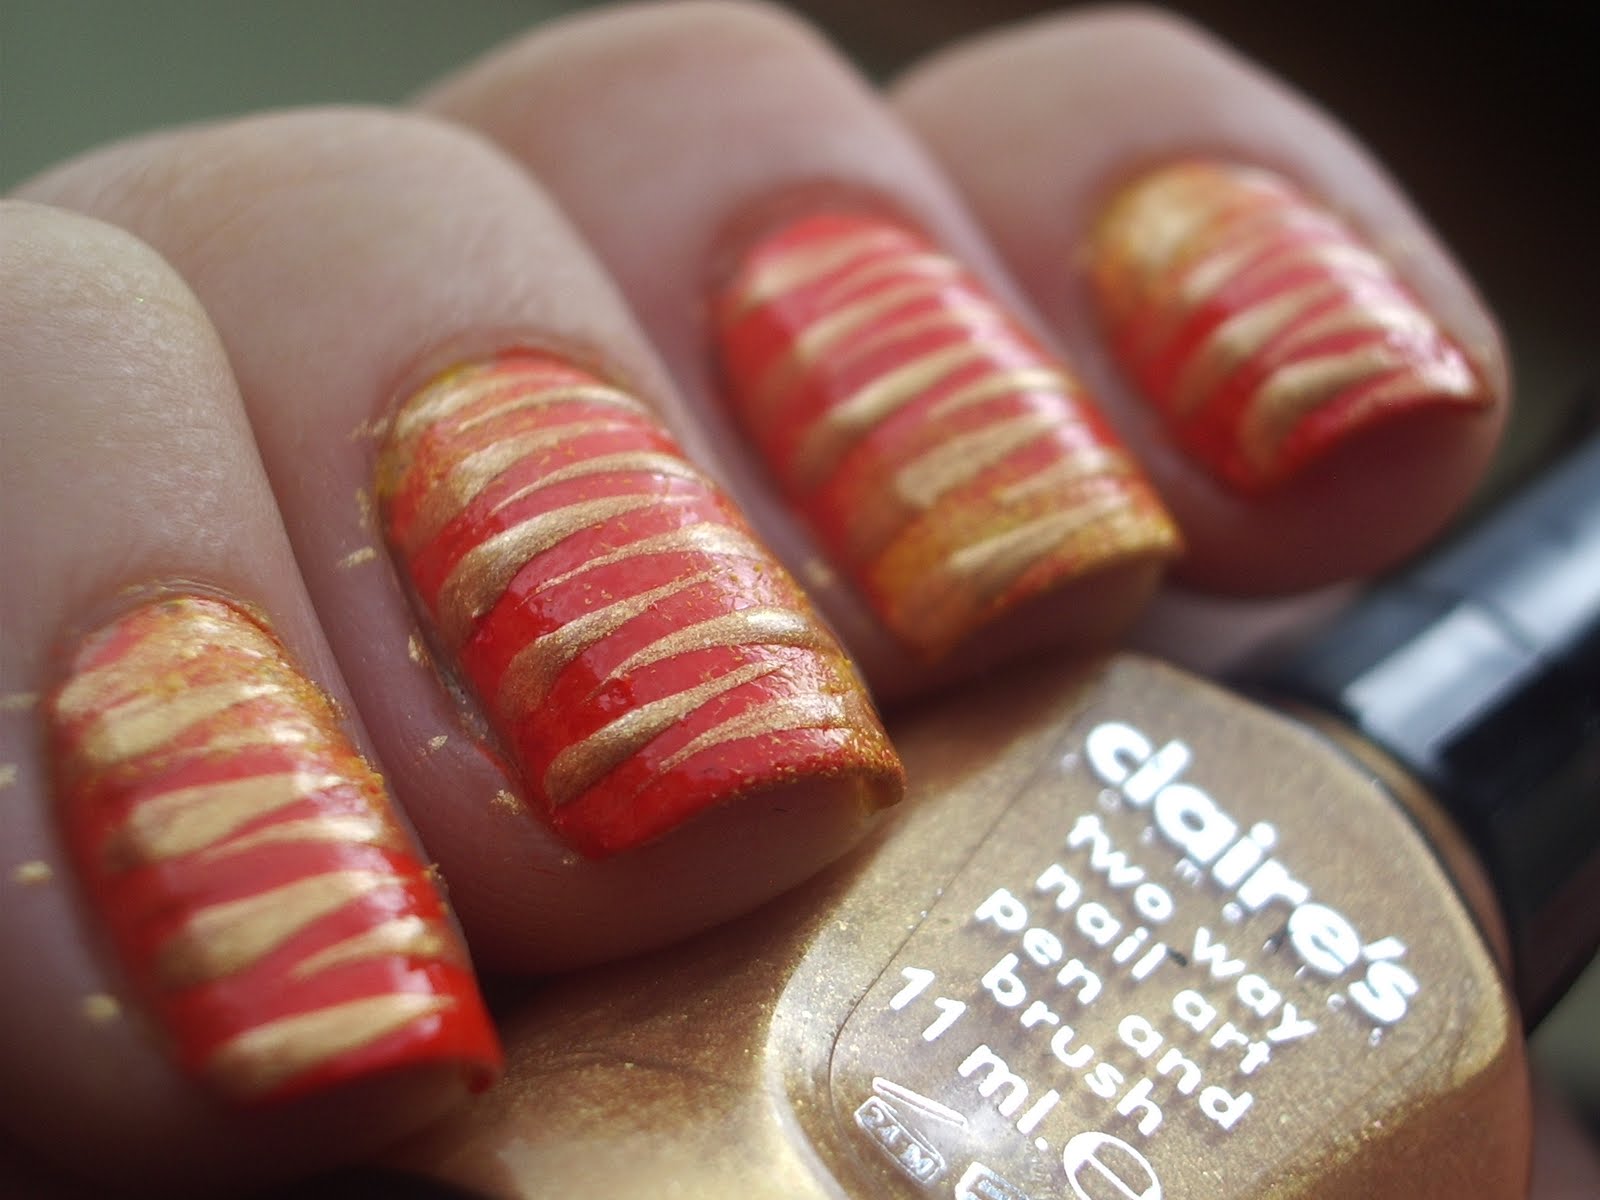
Next comes the stripes, I did two sets of stripes in black and gold, but you could just do the black if you wanted. I used Claire's Nail Art Pens in Black and Gold (the striping brushes inside), but you could easily use a striping brush or regular brush and polish if you don't have pens:


get a small bead of polish on the end of the brush, and starting at the nail edge, draw horizontal stripes that don't touch, but interlock to make the tiger print, zig zag pattern. It works best if you almost flick the striper towards the centre of the nail, as it makes a neat, tapered point. Start with the Gold stripes.


Once it's dry, you can go back with the Black striper, almost exactly on top of your gold stripes:


Add a coat of Seche Vite or your favourite topcoat, and you're done! I added the tiger face as an accent on the ring finger. Take an eyeshadow applicator (as the sponge is smaller and denser!) and add a small amount of white polish. Dab on the orange base like so:


Next, take a green, pink, grey and brown polish . with a dotting tool or brush, add two green dots to the bottom of your white sponged eye areas, and with the pink polish, draw a 'T' shape towards the nail edge. Contour the tiger's nose with two fine lines in brown polish. I added some grey whiskers with a fine brush.


All that's left to add is the black details, for which I used Claire's Black Nail Art Pen. Add your topcoat. You're all finished! Longest. Tutorial. Ever! Rest your tired eyes.


I hope you like them! Let me know what you think! Will you be trying it?

xxx

*EDIT* Because this post took BLOOMIN' AGES, I completely forgot to mention the reason I did this manicure in the first place! I knew Swaffie Blog was having an "inspired" competition, and I really wanted to enter. I was watching a documentary on endangered species, and decided to let the segment on Bengal Tigers be my inspiration! Here is the link to the competition, you can vote for me if you want my love and affection forever and ever and ever, I would really appreciate it :D:D. I am entry number 3! There are some fantastic entries, and you can vote for your favourite three, which I think is a great way of doing it, giving everyone a fair chance! :D


TAXI!

The name of my favourite yellow polish is Taxi! and it's by Miss Sporty. In keeping with the name, I thought I would add some inspired nail art!


I started with two coats of Miss Sporty Taxi! (which is brilliantly opaque for a yellow polish, if a bit thick and gloopy. This can be fixed with a drop of polish thinner, however), which only cost me £1.99 from Superdrug - nice. I then taped off the tips, painted them white, and removed the tape while they were still wet. Once dry, I re-taped the tips and added the checkered image from BM17 using Konad Black Special Polish. I added a coat of Seche Vite, and was ready to go! I had a bit of shrinkage on the nail, which is hard to tell from the photos, does anyone know why this could be?!

So what to do you think to the cab inspired manicure?! Is it something you would wear?

For those of you inquiring about the Giveaway winner, I am in the process of verifying entries, so please bear with me - when I know, you will know.

I hope everyone is well, and not got the Monday Blues too badly!

Easter Manicure

I wanted to quickly show you what I was sporting on Easter Sunday, but first - I have reached 500 followers today! How cool is that?! Thank you so much to everyone who reads! If the 100 follower Giveaway wasn't already running, I would do something to celebrate - I'll rack my brains for something after it's ended!


For this Manicure I used a base of Models Own BlooBoo for all but the ring finger (Rimmel Lemon Drop)  and thumb (American Apparel  Coney Island). I then used Claire's Nail Art Pens and a dotting tool to create the nail art. If you have any questions about any colours, just pop it in the comments and I will let you know - there are too many to name!


 So we have an Easter Chick and an Easter Bunny, who has dropped some eggs off in the grass :D

I love Pastels and Creams, so this was a nice Mani for me to have on! I hope you all had a lovely day and you're not getting as fat as me from over indulgence!

Sorry for the rather sporadic posts, after this MASSIVE piece of work is handed in to Uni, I will be back on form :D

If you haven't already, enter my International 100 Follower Giveaway - PLEASE, PLEASE, PLEASE pop your details in the Google Docs form! I can't accept entries that are added to the comments! Good Luuuuck!

Do Not Refreeze Guest Post

Hello Everyone! Happy Mother's Day!
Today's post is being hosted over at Leanne's wonderful blog DoNotRefreeze, where I will be doing a "lightning bolt nails" tutorial! Its was really kind of her to ask me to do it, and a great idea to get everyone involved.

Head over to HERE for these Bad-ass nails!


xxx

Spring has Sprung!

I went to the shop and bought myself some daffodils (buying yourself flowers? I don't think I've ever looked so lonely...ha!) and the sun is shining through the window! I've done a celebratory Spring Manicure Inspired by the British countryside - flower boxes in the windows of kitsch little cottages and Apple trees on the meadows! I may also enter this into That's SO Fresh's Spring Mani contest, we'll see if I have the confidence haha!


There's that pesky orange again...

 I used so many polishes for this haha, here goes, pinky to thumb :-
  • Lilac is American Apparel L'Espirit, flower stalks are Clarie's Matte Violet and MUA shade 16
  • Blue Sky is Models Own Blooboo, grass is American Apprarel Office, Pale Sun is Rimmel Lemon Drop, Tree leaves is a blobby mix between Barry M 290 Green and Claire's Jade Green. tree trunk is Barry M Mushroom, and the Apples are Barry M Red 292.
  • Pale yellow is Rimmel Lemon Drop, flower stalks are Miss Sporty Taxi! and Bloom Goldie
  • Mint green is American Apparel Office, flower stalks are Barry M Green 290 and Claire's Jade Green
  • Baby doll pink is American Apparely Coney Island, the flower stalks are MUA shade 3 and Bloom Flamingo Sands.
  • All the little daisies were created using Claire's Nail Art Pen in White (thought you could just as easily use a dotting tool, cocktail stick, or even a straightened out bobby pin) and the centre of the daisies is Miss Sporty Taxi!.
PHEW!!!
I don't yet have any brushes or tools, so I used a bobby pin and cocktail stick to draw the details on the ring finger and daisy stalks, as well as the White Nail Art Pen for the picket fence! The contrast between the green grass and blue sky is more pronounced IRL, I wonder why it didn't translate in the photo hhhmm.
I also totally forgot it was St Patrick's Day today (dickhead) and thought it was tomorrow, so I will post pics up tomorrow! I'll give you a hint......Guinness. Haha! Happy Birthday to my Nanny too, sharing a birthday with a Saint's day is pretty apt fort his Wonderful Lady.

I hope you will all do the Irish proud and drink copious amounts of beer - We Brits know how to celebrate.

xxx

Tropical Crackle

Well it's looking like the sunshine is getting me in the mood for summer - I tried the sponging technique for the first time today, creating a gradient from pink to yellow through orange. Heres how it came out!
I did this late last night, so sorry for the shoddy photography and lack of clean up!
I was suprised just HOW EASY this was to create, and it takes no time at all. Firstly, I painted two coats of Barbara Daly for Tesco in Neon Pink, then cut a little bit of sponge off a pan scrubber. I painted a bit of Barbara Daly for Tesco in Salsa to about halfway down the nail. If I were do it again I think I'd sponge in white first, then over the top in orange, just to get a more pronounced effect. I then sponged the tips in Miss Sporty Taxi! to complete the gradient. I love how Beachy this looks :D like a Cosmo cocktail!!
I love the Barry M Nail Effects Crackle Polish, but because the crackles have been so relentlessy blogged about recently, I havent done a post. But...I added it to this look :D

It annoyed me that theres a big black patch of crackle on the middle finger, would've liked to see it crack up a bit more, but oh well. I would have loved to top it all off with a couple of coats of Seche Vite, just to smooth the whole thing out, but I don't yet own the holy grail of topcoats. This looks great from a distance, as it's a really neat fade out. I'd like to do this base and then freehand some black palm trees in, like a tropical sunset, but alas! I am still waiting for my nail art brushes from Evilbay.

CANNOT ACTUALLY WAIT for the Models Own Crackle range - I need that Plum and the Turqouise.

Stay safe homies x

DANGER, DANGER!

Haha! Today is a bit of an outrageous one...
I don't really know why I'm holding an orange. It looks like I'm trying to warn you of the dangers of Satsumas. I'm not. I like them.

I don't really know what gave me the idea for this one, I think I was just looking at Miss Sporty Taxi! and thought "hey, it's like a "warning sign" yellow". And so ensued the birth of the danger fingers.

This is my favie finger, the one that turned out best!

I started with 2 coats of Rimmel Tip Whitener (note: dont use this to paint your whole nails, the brush is tiny and it takes foooreeevvveeerrrrrr, pain in the arse.) followed by two coats of Miss Sporty Taxi! which is exactly that; the colour of a New York cab with a very subtle shimmer - you literally can't even see it IRL, never mind in the pictures! I then used scotch tape cut into strips and did each black side separately using Claire's Black. On the Left hand, I used a Black Striper instead, just to compare the two techniques, but it was, overall, more messy and slooow. I then added the "!" freehand, using Claire's Nail Art Pen in Black. Added a topcoat, and voilaaaaa!

After I did the first triangle side of black, I took a couple of photos (in the dim with the flash, mind) as I quite liked the effect I got - I think I'll repeat this at a later date but with some different colours: -
I hadn't done any clean up at this point...obvs!
So there's your Manicure for today! I had fun doing this one.


A quick FIFTY FIT update for you, seen as it officially started yesterday: I've been eating lean proteins and salad today, I'll have some rice with the chicken for my dinner, then I'm snacking on fruit, low fat yoghurts and olives (God, I bloody love olives). I've given up chocolate for Lent, so it won't get in the way of the challenge! Me and my housemate went to a spinning class earlier today aswell and we worked SO HARD - she was sick afterwards, poor love! I never sweat so much doing anything more than I sweat when I go to a spin class!! Good news, I also lost 4.5lbs last week on weight watchers - it was a happy weigh in day!
lots of love!
xxx

Gotta Catch 'Em All!

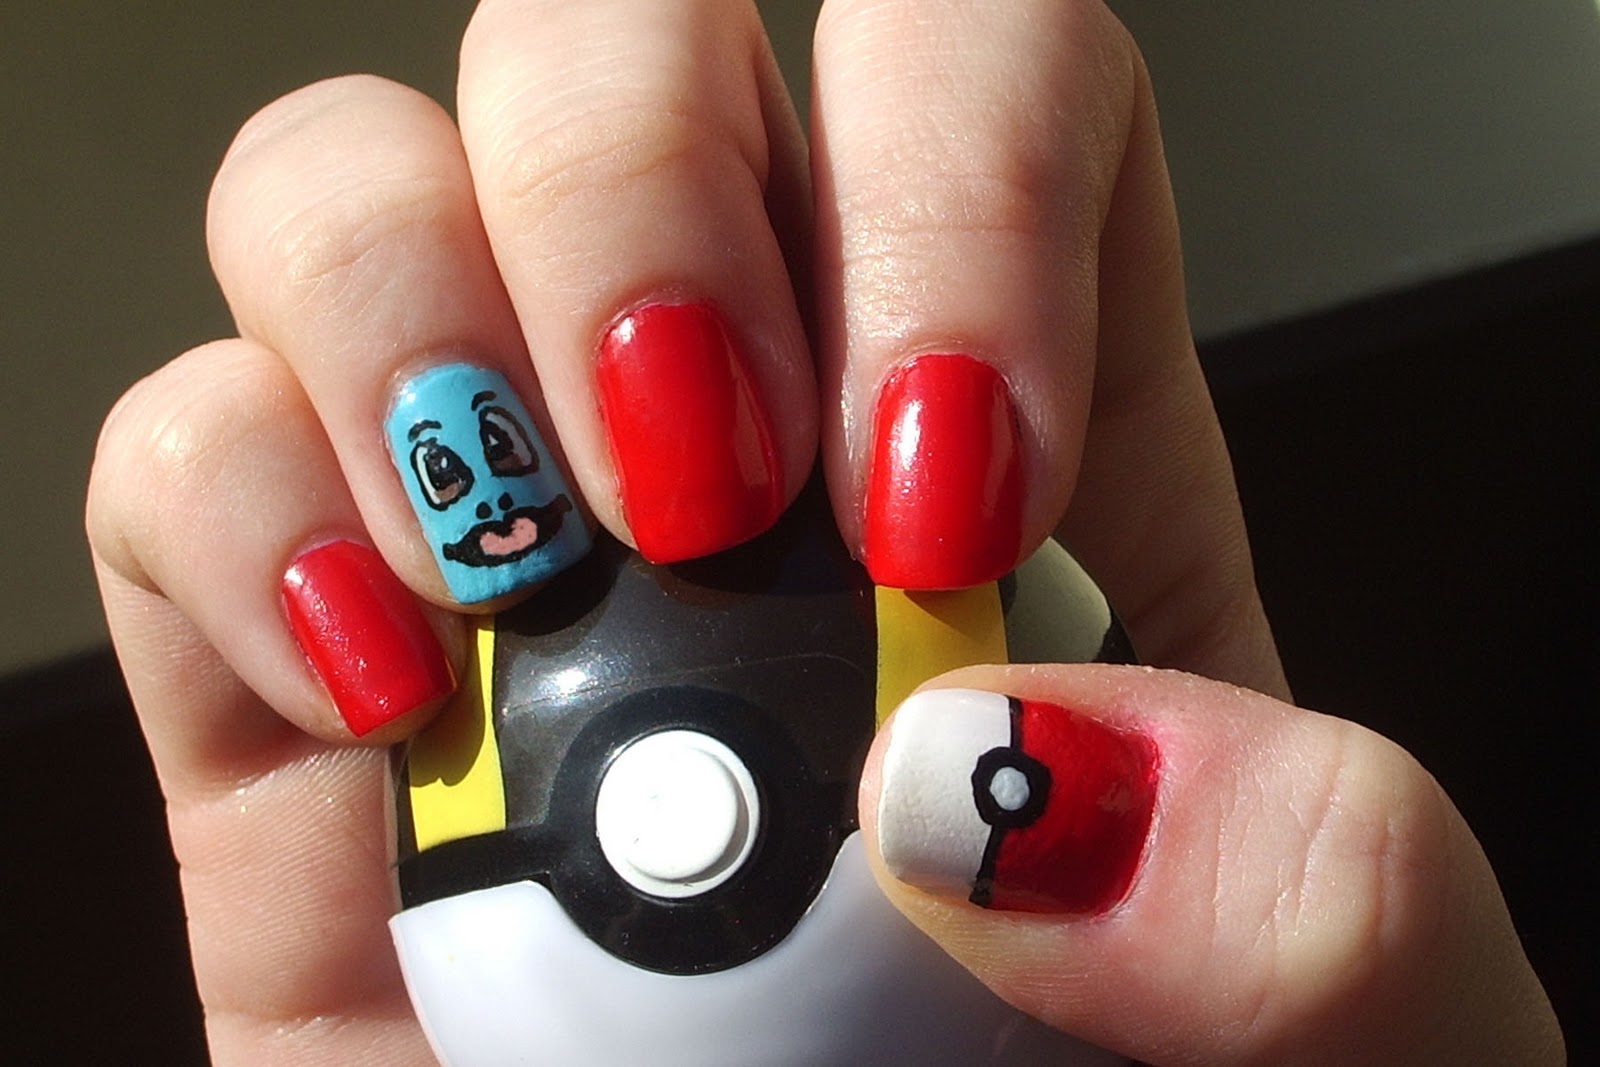
So today is the UK release date for the new Pokemon Black and White game...and I'm kind of a fan :P My Brother and I played as kids, and I guess I've still not grown up! I went into town and picked it up today, and it's all very exciting! Small things please small minds!! Here are my celebratory nails:-
Pokeballs on the thumbs and Pikachu on the left ring finger! :D

Squirtle on the right ring finger :D

Just a bit of fun!!
The Red Polish is Barry M (all the words have rubbed off, I don't know what shade it is!!) and the Blue, for Squirtle is Barry M Turquoise. I used Rimmel Lemon Drop for Pikachu's face, and Claire's Nail Art Pens for the details. This is my first attempt at moderately intricate freehand nail art, and you can really appreciate a steady hand!! To create the Pokeballs I painted the thumb nails white with Rimmel's Tip Whitener, then taped it off with Scotch Tape halfway down and painted them red. I filled in the detail with a black striper and white nail art pen.
I also got some new polishes today (this is getting out of hand!) and some other bits and bobs that I will show you tomorrow!
Let me know what you think of the Pokenails, the shop assistant appreciated them haha!
I hope you're all well, lovely followers. Any suggestions of what you'd like to see from me soon?
Have a Pokelicious day :P x

Inspired by....Paul Smith Rose!

I have a ridiculous habit of falling in love with limited edition perfumes. I think it's a sickness. I only started wearing perfume a couple of years ago, but ever since it's the Summer Edition scents that tend to make my nose happy - I think it's because I love really fresh, light, summery scents like lemon and apple and cherry blossom as opposed to heavier floral ones. Paul Smith Rose Summer Edition is what I've been wearing for nearly a year now and I still smile every time I spray it! It breaks my little heart that I can only get it on Ebay now, booo. The colours on the bottle inspired this manicure, since I was playing with my new Rimmel Fruities anyway...


Nice and Summery! I did this Manicure last week actually, another of my first Konading attempts. The base is three coats of Rimmel Fruities in Lemon Drop - it makes your nails smell like Lemons when its dry yaaaaaaaay! I then stamped from M73 using Bloom Flamingo Sands (one of my favie polishes atm!!)
WOO guys, it's Friday! I hope you all have lovely plans for the weekend, I, for one, have decided to join Laura in her "Fifty Fit" Challenge over at her great Blog Highlight your Beauty, Open your Heart. It's a great idea, you have 50 days to eat healthily and do at least a bit of exercise every day (with 5 days off for special occasions/mental breakdowns that require chocolate) and we can all support each other through the process! How lovely! Come and join us! I'm pretty sure that when you eat chocolate as often as I do, and then you go cold turkey, it can be dangerous. My body will go into shock. Expect weekly updates from me letting you know how it's going! That is, if I've not slipped into a coma from chocolate deficiency.
Thank you all for reading :) 25 followers now! Halfway to the first giveaway! Hurrah!

Blog Archive